


钟小言
致力于为您提供丰富而有趣的内容,旨在启发思考、分享知识。
-
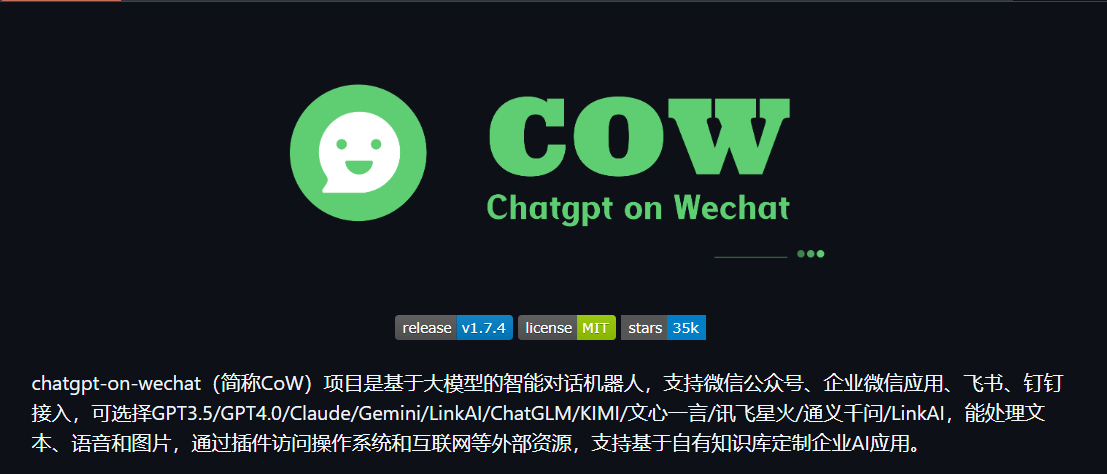 chatgpt-on-wechat 项目多种部署方式 chatgpt-on-wechat 项目提供了多种部署方式,以下是详细的部署步骤: 本地部署 1. 准备工作 系统要求:支持 Linux、MacOS、Windows 系统(可在Linux服务器上长期运行),同时需安装 Python。建议Python版本在 3.7.1 - 3.9.X 之间,推荐3.8版本,3.10及以上版本在 MacOS 可用,其他系统上不确定能否正常运行。 克隆项目代码: git clone https://github.com/zhayujie/chatgpt-on-wechat cd chatgpt-on-wechat/ 注:如遇到网络问题可选择国内镜像 https://gitee.com/zhayujie/chatgpt-on-wechat。 安装依赖: 核心依赖(必选):能够使用itchat创建机器人,并具有文字交流功能所需的最小依赖集合。 pip3 install -r requirements.txt 拓展依赖(可选,建议安装): pip3 install -r requirements-optional.txt 注意:如果某项依赖安装失败可注释掉对应的行再继续。 配置文件: 配置文件的模板在根目录的config-template.json中,需复制该模板创建最终生效的 config.json 文件: cp config-template.json config.json 然后在config.json中填入配置,以下是对默认配置的说明,可根据需要进行自定义修改(注意实际使用时请去掉注释,保证JSON格式的完整): { "model": "gpt-3.5-turbo", // 模型名称, 支持 gpt-3.5-turbo, gpt-4, gpt-4-turbo, wenxin, xunfei, glm-4, claude-3-haiku, moonshot "open_ai_api_key": "YOUR API KEY", // 如果使用openAI模型则填入上面创建的 OpenAI API KEY "open_ai_api_base": "https://api.openai.com/v1", // OpenAI接口代理地址 "proxy": "", // 代理客户端的ip和端口,国内环境开启代理的需要填写该项,如 "127.0.0.1:7890" "single_chat_prefix": , // 私聊时文本需要包含该前缀才能触发机器人回复 "single_chat_reply_prefix": " ", // 私聊时自动回复的前缀,用于区分真人 "group_chat_prefix": , // 群聊时包含该前缀则会触发机器人回复 "group_name_white_list": // 开启自动回复的群名称列表 } 2. 运行项目 使用nohup命令在后台运行程序: nohup python3 app.py & tail -f nohup.out # 在后台运行程序并通过日志输出二维码 扫码登录后程序即可运行于服务器后台,此时可通过 ctrl+c 关闭日志,不会影响后台程序的运行。使用 ps -ef | grep app.py | grep -v grep 命令可查看运行于后台的进程,如果想要重新启动程序可以先 kill 掉对应的进程。日志关闭后如果想要再次打开只需输入 tail -f nohup.out。此外,scripts 目录下有一键运行、关闭程序的脚本供使用。 多账号支持:将项目复制多份,分别启动程序,用不同账号扫码登录即可实现同时运行。 特殊指令:用户向机器人发送 #reset 即可清空该用户的上下文记忆。 Docker部署 前提条件:需要安装好 docker 及 docker-compose,安装成功的表现是执行 docker -v 和 docker-compose version (或 docker compose version) 可以查看到版本号,可前往 docker官网 进行下载。 步骤: 1.下载 docker-compose.yml 文件: wget https://open-1317903499.cos.ap-guangzhou.myqcloud.com/docker-compose.yml 下载完成后打开 docker-compose.yml 修改所需配置,如 OPEN_AI_API_KEY 和 GROUP_NAME_WHITE_LIST 等。 2.启动容器: 在 docker-compose.yml 所在目录下执行以下命令启动容器: sudo docker compose up -d 注意:如果 docker-compose 是 1.X 版本 则需要执行 sudo docker-compose up -d 来启动容器。 运行 sudo docker ps 能查看到 NAMES 为 chatgpt-on-wechat 的容器即表示运行成功。 3.查看容器运行日志: sudo docker logs -f chatgpt-on-wechat 扫描日志中的二维码即可完成登录。 4.插件使用: 如果需要在docker容器中修改插件配置,可通过挂载的方式完成,将 插件配置文件 重命名为 config.json,放置于 docker-compose.yml 相同目录下,并在 docker-compose.yml 中的 chatgpt-on-wechat 部分下添加 volumes 映射: volumes: - ./config.json:/app/plugins/config.json Railway部署 Railway 每月提供5刀和最多500小时的免费额度。 (07.11更新: 目前大部分账号已无法免费部署) 步骤: 进入 Railway。 点击 Deploy Now 按钮。 设置环境变量来重载程序运行的参数,例如open_ai_api_key, character_desc。 一键部署: https://railway.com/template/qApznZ?referralCode=RC3znh
 -
 DeepSeek 满血版本地化傻瓜式可视化部署方案 DeepSeek满血版本地化傻瓜式可视化部署方案 一、方案背景与目标 背景 DeepSeek作为先进的大语言模型,具备强大的语言理解和生成能力。将其进行本地化部署,能够在保障数据安全和隐私的同时,满足特定场景下的高效使用需求。本方案旨在为非专业技术人员提供一种简单、直观的方式,实现DeepSeek满血版的本地部署与使用。 目标 通过傻瓜式、可视化的部署流程,让用户能够轻松在本地环境搭建DeepSeek模型,并通过可视化界面与之交互,完成文本生成、问答等任务。 二、准备工作 硬件要求 硬件组件 推荐配置 说明 CPU Intel Core i7 及以上或 AMD Ryzen 7 及以上 多核心处理器可加速模型推理过程 内存 16GB 及以上 足够的内存可避免因内存不足导致的程序崩溃 硬盘 512GB 及以上 SSD 快速的读写速度可加快模型文件加载和数据处理 GPU NVIDIA GeForce RTX 3060 及以上 支持 CUDA 加速,显著提升模型运行效率 网络 稳定的宽带网络 用于下载软件、代码和模型文件 软件准备 Anaconda Anaconda 是一个开源的 Python 发行版本,包含了 Python、众多科学计算库以及包管理工具 conda。 下载:访问 Anaconda 官网(https://www.anaconda.com/download ),根据自己的操作系统(Windows、Mac OS、Linux)选择对应的安装包进行下载。 安装:运行下载好的安装包,按照安装向导的提示进行操作。在安装过程中,建议勾选“Add Anaconda to my PATH environment variable”选项,以便在命令行中可以直接使用 conda 命令。 Git 客户端 Git 是一种分布式版本控制系统,用于管理代码的版本和协作开发。 下载:访问 Git 官网(https://git-scm.com/downloads ),选择适合自己操作系统的版本进行下载。 安装:运行下载好的安装包,按照默认设置完成安装。安装完成后,在命令行中输入 git --version 验证安装是否成功。 NVIDIA 驱动 如果你的计算机配备了 NVIDIA GPU,需要安装相应的驱动程序以支持 CUDA 加速。 下载:访问 NVIDIA 官网(https://www.nvidia.com/Download/index.aspx ),根据自己的 GPU 型号、操作系统和 CUDA 版本选择合适的驱动程序进行下载。 安装:运行下载好的驱动程序安装包,按照安装向导的提示完成安装。安装完成后,在命令行中输入 nvidia-smi 验证驱动是否安装成功。 CUDA 和 cuDNN(可选但推荐) CUDA 是 NVIDIA 推出的并行计算平台和编程模型,cuDNN 是 NVIDIA 提供的深度神经网络库,它们可以显著加速基于 GPU 的深度学习模型训练和推理。 CUDA 安装:访问 NVIDIA CUDA 官网(https://developer.nvidia.com/cuda-downloads ),选择适合自己操作系统的 CUDA 版本进行下载和安装。安装过程中按照提示进行操作,注意记录安装路径。 cuDNN 安装:访问 NVIDIA cuDNN 官网(https://developer.nvidia.com/cudnn ),注册并登录后下载与 CUDA 版本兼容的 cuDNN 库。将下载的压缩包解压后,将其中的文件复制到 CUDA 安装目录对应的文件夹中。 三、部署步骤 1. 创建并激活 Anaconda 环境 打开 Anaconda Prompt(Windows)或终端(Mac OS、Linux)。 输入以下命令创建一个名为 deepseek_env 的 Python 3.8 环境: conda create -n deepseek_env python=3.8 输入以下命令激活该环境: conda activate deepseek_env 2. 获取 DeepSeek 代码 在激活的 Anaconda 环境下,打开 Git Bash(Windows)或终端(Mac OS、Linux)。 输入以下命令将 DeepSeek 代码克隆到本地: git clone <DeepSeek代码仓库地址> 请将 <DeepSeek代码仓库地址> 替换为 DeepSeek 官方提供的真实代码仓库链接。如果代码仓库是私有的,可能需要输入用户名和密码进行身份验证。 3. 安装依赖包 进入克隆下来的 DeepSeek 代码目录,例如: cd deepseek 输入以下命令安装运行所需的依赖包: pip install -r requirements.txt 安装过程可能会持续一段时间,具体时间取决于网络速度和依赖包的数量。如果在安装过程中遇到问题,可以尝试使用国内镜像源加速下载,例如: pip install -r requirements.txt -i https://pypi.tuna.tsinghua.edu.cn/simple 4. 下载模型文件 从 DeepSeek 官方指定的模型下载地址获取满血版模型文件。这些文件可能包含模型权重、配置文件等。 创建一个 models 文件夹用于存放模型文件: mkdir models 将下载好的模型文件解压到 models 文件夹中。确保文件路径与代码中配置的模型路径一致。 5. 配置环境变量(可选) 如果安装了 CUDA 和 cuDNN,需要配置相应的环境变量,以便程序能够正确找到这些库。 在 Windows 系统中,右键点击“此电脑”,选择“属性” -> “高级系统设置” -> “环境变量”,在系统变量中添加以下变量: CUDA_PATH:指向 CUDA 安装目录,例如 C:\Program Files\NVIDIA GPU Computing Toolkit\CUDA\v11.7 PATH:在原有的 PATH 变量中添加 %CUDA_PATH%\bin 和 %CUDA_PATH%\libnvvp 在 Linux 或 Mac OS 系统中,编辑 ~/.bashrc 或 ~/.zshrc 文件,添加以下内容: export PATH=/usr/local/cuda/bin:$PATH export LD_LIBRARY_PATH=/usr/local/cuda/lib64:$LD_LIBRARY_PATH 然后执行 source ~/.bashrc 或 source ~/.zshrc 使配置生效。 6. 启动可视化界面 在代码目录下,输入以下命令启动可视化界面: python app.py 启动成功后,会在命令行中显示一个本地链接,如 http://127.0.0.1:7860。 打开浏览器,输入该链接,即可看到 DeepSeek 的可视化界面。 四、测试与优化 简单测试 在可视化界面中输入一些测试文本,例如:“介绍一下人工智能”,然后点击生成按钮。 观察生成结果是否符合预期,包括文本的逻辑性、语法正确性和相关性。 如果生成结果出现错误或不符合要求,可以尝试调整输入文本的表述方式或修改模型的参数设置。 性能优化 调整模型参数 在可视化界面的设置选项中,通常可以找到一些模型参数,如生成的最大长度、采样温度等。 最大长度:适当降低最大长度可以减少生成时间,但可能会导致生成的文本不够完整。 采样温度:降低采样温度可以使生成的文本更加确定和保守,提高采样温度可以使生成的文本更加多样化和随机。 资源管理 定期清理缓存文件,释放硬盘空间。可在代码目录下找到缓存文件夹进行清理。 关闭不必要的后台程序,以确保计算机有足够的资源用于运行 DeepSeek 模型。 硬件升级 如果在使用过程中发现性能仍然无法满足需求,可以考虑升级硬件,如增加内存、更换更强大的 GPU 等。 五、常见问题及解决方法 依赖包安装失败 问题描述:在执行 pip install -r requirements.txt 时,部分依赖包安装失败。 解决方法: 检查网络连接是否稳定,尝试使用国内镜像源加速下载。 查看错误信息,可能是某些依赖包版本不兼容。可以尝试手动安装指定版本的依赖包,例如 pip install package_name==version_number。 模型文件加载失败 问题描述:启动可视化界面时,提示模型文件加载失败。 解决方法: 检查模型文件是否完整下载并解压到正确的目录。 确保代码中配置的模型路径与实际模型文件路径一致。 GPU 加速未生效 问题描述:计算机配备了 NVIDIA GPU,但在运行过程中未使用 GPU 加速。 解决方法: 检查 NVIDIA 驱动、CUDA 和 cuDNN 是否正确安装并配置。 在代码中添加相应的 GPU 配置代码,例如: import torch device = torch.device("cuda" if torch.cuda.is_available() else "cpu") model.to(device) 六、总结 通过以上步骤,你可以轻松地在本地环境实现 DeepSeek 满血版的傻瓜式、可视化部署。在部署过程中,按照准备工作的要求确保硬件和软件环境的正确性,严格遵循部署步骤进行操作。遇到问题时,参考常见问题及解决方法进行排查和修复。
 -
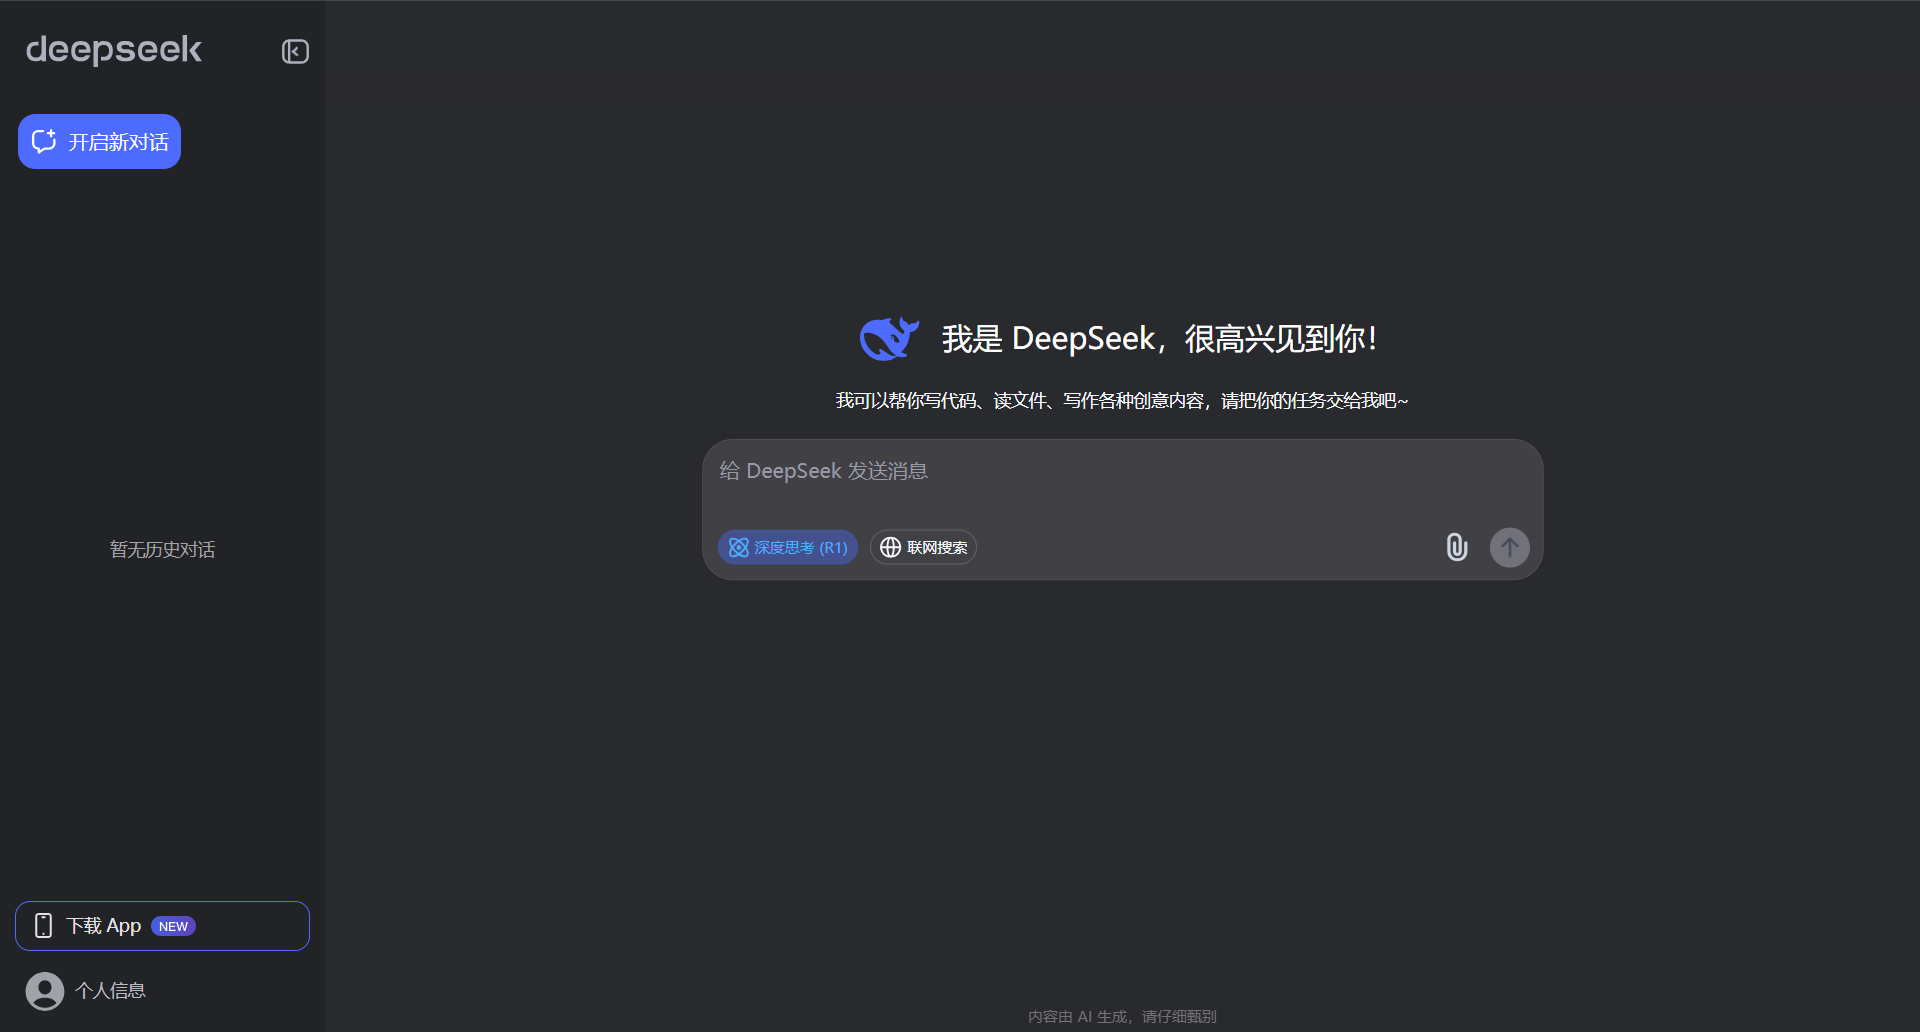
 DeepSeek 本地部署AI对话网页版 DeepSeek 本地部署AI对话网页版 安装指南 安装 ollama 访问 https://www.ollama.com/ ,下载安装包,安装 ollama 安装deepseek-r1:7b模型 访问 https://www.ollama.com/library/deepseek-r1 ,在命令行执行如下命令,安装deepseek-r1:7b模型 ollama run deepseek-r1:14b 下载本项目代码,DeepSeek 本地部署AI对话网页版 下载本项目代码。 git clone https://gitee.com/deepseeklocal/deepseek-local.git 安装nodejs 访问 https://nodejs.org/zh-cn/download ,下载安装包,安装nodejs 进入deepseek-local目录,运行如下命令,启动nodejs服务 npm install node app.js 访问 http://localhost:8888 ,即可看到DeepSeek 本地部署AI对话网页版 管理员默认登录账号: admin 密码:111111 点击“聊天”,即可看到DeepSeek 本地部署AI对话网页版
 -
 如何将 Chatbox 连接到远程 Ollama 服务 现在有越来越多的开源模型,可以让你在自己的电脑或服务器上运行。使用本地模型有许多优势: 完全离线运行,保护隐私数据安全 无需支付在线 API 费用 完全离线,服务稳定,无网络延迟 可以自由调整和定制模型参数 Chatbox 可以很好地连接到 Ollama 服务,让你在使用本地模型时可以获取 Chatbox 提供的更多强大功能,比如 Artifact Preview、文件解析、会话话题管理、Prompt 管理等。 (注意:运行本地模型对你的电脑配置有一定要求,包括内存、GPU 等。如果出现卡顿,请尝试降低模型参数。) 安装 Ollama Ollama 是一个开源的本地模型运行工具,可以方便地下载和运行各种开源模型,比如 Llama、Qwen、DeepSeek 等。这个工具支持 Windows、MacOS、Linux 等操作系统。 Ollama 下载地址 https://ollama.com/ 下载并运行本地模型 下载并安装 Ollama 后,请打开命令行终端,输入命令下载并运行本地模型。你可以在这里查看到所有 ollama 支持的模型列表:Ollama 模型列表。 举例1:下载并运行 llama3.2 模型 ollama run llama3.2 举例2:下载并运行 deepseek-r1:8b 模型(注意:Ollama 上的 DeepSeek R1 模型实际上是蒸馏模型) ollama run deepseek-r1:8b 在 Chatbox 中连接本地 Ollama 服务 在 Chatbox 中打开设置,在模型提供方中选择 Ollama,即可在模型下拉框中看见你运行的本地模型。 点击保存,即可正常聊天使用。 在 Chatbox 中连接远程 Ollama 服务 除了可以轻松连接本地 Ollama 服务,Chatbox 也支持连接到运行在其他机器上的远程 Ollama 服务。 例如,你可以在家中的电脑上运行 Ollama 服务,并在手机或其他电脑上使用 Chatbox 客户端连接到这个服务。 你需要确保远程 Ollama 服务正确配置并暴露在当前网络中,以便 Chatbox 可以访问。默认情况下,需要对远程 Ollama 服务进行简单的配置。 如何配置远程 Ollama 服务? 默认情况下,Ollama 服务仅在本地运行,不对外提供服务。要使 Ollama 服务能够对外提供服务,你需要设置以下两个环境变量: OLLAMA_HOST=0.0.0.0 OLLAMA_ORIGINS=* 在 MacOS 上配置 1、打开命令行终端,输入以下命令: launchctl setenv OLLAMA_HOST "0.0.0.0" launchctl setenv OLLAMA_ORIGINS "*" 2、重启 Ollama 应用,使配置生效。 在 Windows 上配置 在 Windows 上,Ollama 会继承你的用户和系统环境变量。 1、通过任务栏退出 Ollama。 2、打开设置(Windows 11)或控制面板(Windows 10),并搜索“环境变量”。 3、点击编辑你账户的环境变量。 为你的用户账户编辑或创建新的变量 OLLAMA_HOST,值为 0.0.0.0; 为你的用户账户编辑或创建新的变量 OLLAMA_ORIGINS,值为 *。 4、点击确定/应用以保存设置。 5、从 Windows 开始菜单启动 Ollama 应用程序。 在 Linux 上配置 如果 Ollama 作为 systemd 服务运行,应使用 systemctl 设置环境变量: 1、调用 systemctl edit ollama.service 编辑 systemd 服务配置。这将打开一个编辑器。 2、在 部分下为每个环境变量添加一行 Environment: Environment="OLLAMA_HOST=0.0.0.0" Environment="OLLAMA_ORIGINS=*" 3、保存并退出。 4、重新加载 systemd 并重启 Ollama: systemctl daemon-reload systemctl restart ollama 服务 IP 地址 配置后,Ollama 服务将能在当前网络(如家庭 Wifi)中提供服务。你可以使用其他设备上的 Chatbox 客户端连接到此服务。 Ollama 服务的 IP 地址是你电脑在当前网络中的地址,通常形式如下: 192.168.XX.XX 在 Chatbox 中,将 API Host 设置为: http://192.168.XX.XX:11434 注意事项 可能需要在防火墙中允许 Ollama 服务的端口(默认为 11434),具体取决于你的操作系统和网络环境。 为避免安全风险,请不要将 Ollama 服务暴露在公共网络中。家庭 Wifi 网络是一个相对安全的环境。
 -
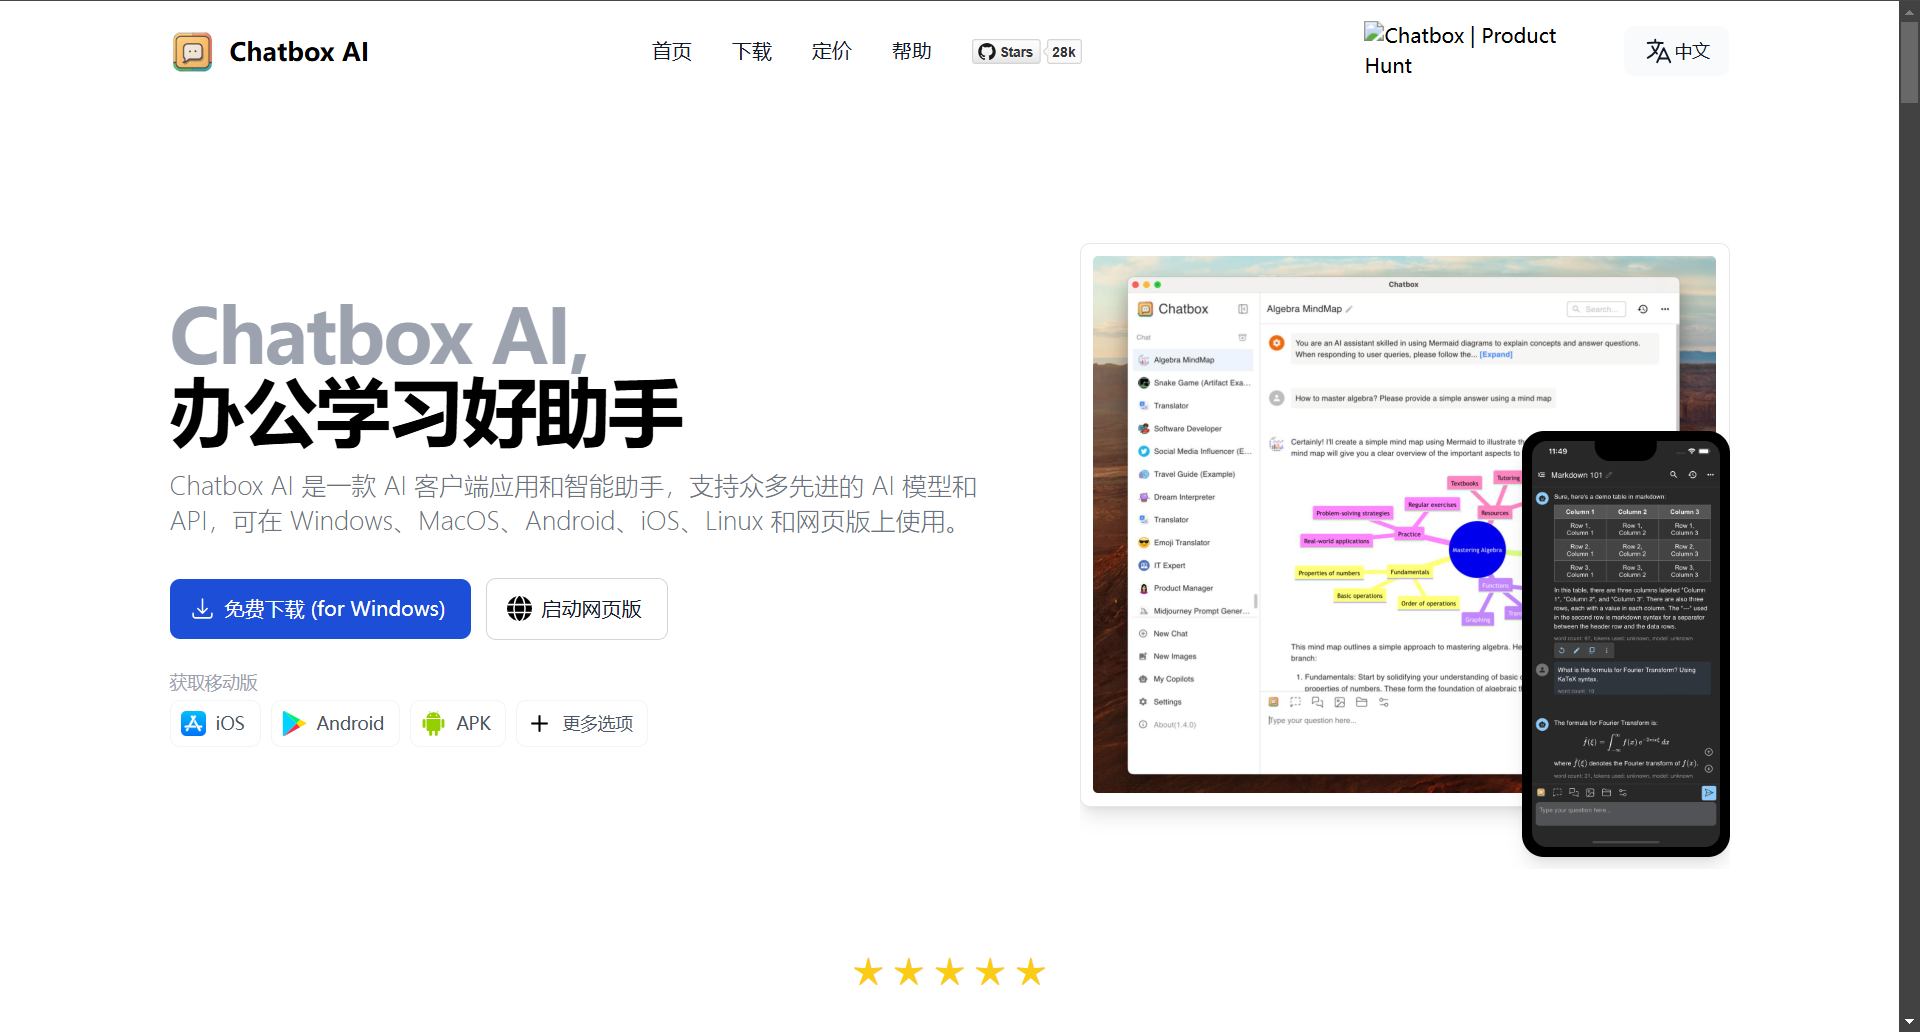
 DeepSeek本地部署,保姆级教程,带你打造最强AI deepseek本地部署 第一步:安装ollama https://ollama.com/download 第二步:在ollama 官网搜索 https://ollama.com/ 模型大小与显卡需求 第三步:在终端执行 命令 等待安装即可 第五步:基本命令 #退出模型 >>> /bye #查看模型 C:\Users\chk>ollama list NAME ID SIZE MODIFIED deepseek-r1:1.5b a42b25d8c10a 1.1 GB 3 minutes ago #启动模型 ollama run deepseek-r1:1.5b >>> #查看帮助 C:\Users\chk>ollama -h Large language model runner Usage: ollama ollama Available Commands: serve Start ollama create Create a model from a Modelfile show Show information for a model run Run a model stop Stop a running model pull Pull a model from a registry push Push a model to a registry list List models ps List running models cp Copy a model rm Remove a model help Help about any command Flags: -h, --help help for ollama -v, --version Show version information Use "ollama --help" for more information about a command. 可视化部署Web UI 第一步:下载Chatbox AI https://chatboxai.app/zh 设置中文 第二步:将 Chatbox 连接到远程 Ollama 服务 1.在 Windows 上配置环境变量 在 Windows 上,Ollama 会继承你的用户和系统环境变量。 通过任务栏退出 Ollama。 打开设置(Windows 11)或控制面板(Windows 10),并搜索“环境变量”。 点击编辑你账户的环境变量。 为你的用户账户编辑或创建新的变量 OLLAMA_HOST,值为 0.0.0.0; 为你的用户账户编辑或创建新的变量 OLLAMA_ORIGINS,值为 *。 点击确定/应用以保存设置。 从 Windows 开始菜单启动 Ollama 应用程序。 2.服务 IP 地址 配置后,Ollama 服务将能在当前网络(如家庭 Wifi)中提供服务。你可以使用其他设备上的 Chatbox 客户端连接到此服务。Ollama 服务的 IP 地址是你电脑在当前网络中的地址。 3.注意事项 可能需要在防火墙中允许 Ollama 服务的端口(默认为 11434),具体取决于你的操作系统和网络环境。 为避免安全风险,请不要将 Ollama 服务暴露在公共网络中。家庭 Wifi 网络是一个相对安全的环境。 4.Chatbox配置模型
 -
 常用思科、华为、H3C交换机巡检命令 一、思科交换机巡检命令 1、show interface stats:查看交换机所有接口当前接口流量 2、show running-config:查看当前设备配置 3、show version:查看IOS版本信息及设备正常运行时间 4、show clock:查看设备时钟信息 5、show vtp status:查看交换机vtp配置模式 6、show vtp password:查看交换机vtp配置口令 7、show env all:查看设备温度,电源和风扇运转参数及是否报警 8、show inventory:调取设备内部板卡出厂模块型号及序列号 9、show spanning-tree root:查看交换机生成树根位置 10、show cdp neighbors:查看邻接cisco设备基本信息 11、show cdp neighbors detail:查看邻接cisco设备详细信息 12、show interface status:查看交换机接口状态是否存在errordisable接口disable接口 13、show interface summary:查看交换机所有接口当前接口流量 14、show interface |ierrors|FastEthernet|GigabitEthernet:查看接口是否存在大量input或output errors包错误 15、show processes cpu:查看设备cpu负载 16、show processes mem:查看设备mem负载 17、show access-list:查看访问控制列表配置及匹配数据包数量 18、show logging:查看本机内部日志记录情况 19、show ip route:查看路由表 20、show firewall:检查防火墙的工作模式 21、show conn count:检查防火墙并发数 22、show xlate count:检查防火墙nat工作状态 二、华为/H3C交换机常用巡检命令 system-view #进入系统视图 user-interface vty 0 4 #vty就是用telnet/ssh远程进入交换机的界面(虚拟界面) 2、硬件状态、IOS版本信息检查 display clock #系统时间 display version #查看版本信息,最近一次重新启动的时间 display enviroment #设备温度 display device #单板运行状态 display device manuinfor #查看设备序列号 display power #查看电源状况 display fan #查看风扇状况 display cpu-usage #查看cpu最近5S、1m、5m占用率 display cpu history #查看cpu使用记录 display cpu-usage task #查看CPU利用率 display memory #查看内存大小和占用率 display logbuffer #日志缓冲区 dir flash: #查看flash dis boot-loader #显示软件映像文件 display arp #查看arp表(目的IP与目的MAC的映射关系) display mac-address #查看mac地址表(二层转发通过mac地址表) display ntp status #ntp状态信息 reset counters interface #清除接口统计信息,方便下次巡检查看接口错误包是否增加 display elabel #路由器设备命令—查看电子标签信息(华为)改用display device manuinfo display ndp #路由器设备命令—华三V5版本支持,现在改用display lldp neighbor-information display diagnostic-information #故障信息收集 2、系统运行配置状态检查 display interface #接口流量、链路状态 dis current-configuration inter #地址分配 dis current-configuration |include ospf #路由扩散 display ip routing-table #路由信息 display ip interface #显示 vlan 端口统计数据 display saved-configuration #保存配置文件 display logbuffer #日志信息 display port trunk #查看参与 trunk 的端口 3、STP 信息检查 display stp root #查看 stp 根情况 display stp brief #查看 stp 简单信息 display stp abnormal-port #查看是否有非正常端口 display stp region-configuration #生成树区域配置 display lldp neighbor-information #查看链路层邻居发现协议(邻居信息) display tcp status #路由器设备命令—tcp统计数据 display tcp statistics #交换机设备命令—tcp统计数据 4、 vrrp 和端口聚合检查 display vrrp #查看虚拟路由冗余协议 display vrrp statistics #查看主备用状态 display link-aggregation summary #查看链路聚合组的情况
 -
 openEuler-22.03-LTS部署kubernetes 一、安装要求 在开始之前,部署Kubernetes集群机器需要满足以下几个条件: • 一台或多台机器,操作系统 欧拉系统 • 硬件配置:2GB或更多RAM,2个CPU或更多CPU,硬盘30GB或更多 • 集群中所有机器之间网络互通 • 可以访问外网,需要拉取镜像 • 禁止swap分区 1.2 主机硬件配置说明 CPU 内存 角色 主机名 4C 4G Master k8s-master 4C 4G Node01 k8s-node01 4C 4G Node02 k8s-node02 二、主机准备 2.1 主机名配置 由于本次使用3台主机完成kubernetes集群部署,其中1台为master节点,名称为k8s-master01;其中2台为node节点,名称分别为:k8s-node01及k8s-node02 master节点 hostnamectl set-hostname k8s-master01 node01节点 hostnamectl set-hostname k8s-node01 node02节点 hostnamectl set-hostname k8s-node02 在master添加hosts: cat >> /etc/hosts << EOF 192.168.10.1 k8s-master 192.168.10.2 k8s-node1 192.168.10.3 k8s-node2 EOF 2.2 主机IP地址配置 k8s-master01节点IP地址为:192.168.10.1/24 vim /etc/sysconfig/network-scripts/ifcfg-ens33 TYPE="Ethernet" PROXY_METHOD="none" BROWSER_ONLY="no" BOOTPROTO="none" DEFROUTE="yes" IPV4_FAILURE_FATAL="no" IPV6INIT="yes" IPV6_AUTOCONF="yes" IPV6_DEFROUTE="yes" IPV6_FAILURE_FATAL="no" IPV6_ADDR_GEN_MODE="stable-privacy" NAME="ens33" DEVICE="ens33" ONBOOT="yes" IPADDR="192.168.10.1" PREFIX="24" GATEWAY="192.168.10.254" DNS1="8.8.8.8" k8s-node01节点IP地址为:192.168.10.2/24 vim /etc/sysconfig/network-scripts/ifcfg-ens33 TYPE="Ethernet" PROXY_METHOD="none" BROWSER_ONLY="no" BOOTPROTO="none" DEFROUTE="yes" IPV4_FAILURE_FATAL="no" IPV6INIT="yes" IPV6_AUTOCONF="yes" IPV6_DEFROUTE="yes" IPV6_FAILURE_FATAL="no" IPV6_ADDR_GEN_MODE="stable-privacy" NAME="ens33" DEVICE="ens33" ONBOOT="yes" IPADDR="192.168.10.2" PREFIX="24" GATEWAY="192.168.10.254" DNS1="8.8.8.8" k8s-node02节点IP地址为:192.168.10.3/24 vim /etc/sysconfig/network-scripts/ifcfg-ens33 TYPE="Ethernet" PROXY_METHOD="none" BROWSER_ONLY="no" BOOTPROTO="none" DEFROUTE="yes" IPV4_FAILURE_FATAL="no" IPV6INIT="yes" IPV6_AUTOCONF="yes" IPV6_DEFROUTE="yes" IPV6_FAILURE_FATAL="no" IPV6_ADDR_GEN_MODE="stable-privacy" NAME="ens33" DEVICE="ens33" ONBOOT="yes" IPADDR="192.168.10.3" PREFIX="24" GATEWAY="192.168.10.254" DNS1="8.8.8.8" 2.3 主机名与IP地址解析 所有集群主机均需要进行配置。 cat /etc/hosts 127.0.0.1 localhost localhost.localdomain localhost4 localhost4.localdomain4 ::1 localhost localhost.localdomain localhost6 localhost6.localdomain6 192.168.10.1 k8s-master01 192.168.10.2 k8s-node01 192.168.10.3 k8s-node02 2.4 防火墙配置 所有主机均需要操作。 关闭现有防火墙firewalld systemctl disable firewalld systemctl stop firewalld firewall-cmd --state not running 2.5 SELINUX配置 所有主机均需要操作。修改SELinux配置需要重启操作系统。 sed -ri 's/SELINUX=enforcing/SELINUX=disabled/' /etc/selinux/config 2.6 时间同步配置 所有主机均需要操作。最小化安装系统需要安装ntpdate软件。 yum install ntpdate -y ntpdate time1.aliyun.com 修改时区 ln -sf /usr/share/zoneinfo/Asia/Shanghai /etc/localtime 修改语言 sudo echo 'LANG="en_US.UTF-8"' >> /etc/profile;source /etc/profile 2.7 配置内核转发及网桥过滤 所有主机均需要操作。 将桥接的IPv4流量传递到iptables的链: cat > /etc/sysctl.d/k8s.conf << EOF net.bridge.bridge-nf-call-ip6tables = 1 net.bridge.bridge-nf-call-iptables = 1 net.bridge.bridge-nf-call-iptables=1 net.bridge.bridge-nf-call-ip6tables=1 net.ipv4.ip_forward=1 net.ipv4.tcp_tw_recycle=0 vm.swappiness=0 vm.overcommit_memory=1 vm.panic_on_oom=0 fs.inotify.max_user_instances=8192 fs.inotify.max_user_watches=1048576 fs.file-max=52706963 fs.nr_open=52706963 net.ipv6.conf.all.disable_ipv6=1 net.netfilter.nf_conntrack_max=2310720 EOF sysctl --system 开启内核路由转发 vi /etc/sysctl.conf net.ipv4.ip_forward=1 添加网桥过滤及内核转发配置文件 cat /etc/sysctl.d/k8s.conf net.bridge.bridge-nf-call-ip6tables = 1 net.bridge.bridge-nf-call-iptables = 1 vm.swappiness = 0 加载br_netfilter模块 modprobe br_netfilter 查看是否加载 lsmod | grep br_netfilter br_netfilter 22256 0 bridge 151336 1 br_netfilter 使用默认配置文件生效 sysctl -p 使用新添加配置文件生效 sysctl -p /etc/sysctl.d/k8s.conf 2.8 安装ipset及ipvsadm 所有主机均需要操作。 安装ipset及ipvsadm yum -y install ipset ipvsadm 配置ipvsadm模块加载方式 添加需要加载的模块 cat > /etc/sysconfig/modules/ipvs.modules <<EOF #!/bin/bash modprobe -- ip_vs modprobe -- ip_vs_rr modprobe -- ip_vs_wrr modprobe -- ip_vs_sh modprobe -- nf_conntrack EOF 授权、运行、检查是否加载 chmod 755 /etc/sysconfig/modules/ipvs.modules && bash /etc/sysconfig/modules/ipvs.modules && lsmod | grep -e ip_vs -e nf_conntrack 2.9 关闭SWAP分区 修改完成后需要重启操作系统,如不重启,可临时关闭,命令为swapoff -a 临时关闭 swapoff -a 永远关闭swap分区,需要重启操作系统 cat /etc/fstab ...... # /dev/mapper/openeuler-swap none swap defaults 0 0 在上一行中行首添加# 三、容器运行时工具安装及运行 查看是否存在docker软件 yum list | grep docker pcp-pmda-docker.x86_64 5.3.7-2.oe2203sp1 docker-client-java.noarch 8.11.7-2.oe2203sp1 docker-client-java.src 8.11.7-2.oe2203sp1 docker-compose.noarch 1.22.0-4.oe2203sp1 docker-compose.src 1.22.0-4.oe2203sp1 docker-engine.src 2:18.09.0-316.oe220 docker-engine.x86_64 2:18.09.0-316.oe220 docker-engine.x86_64 2:18.09.0-316.oe220 docker-engine-debuginfo.x86_64 2:18.09.0-316.oe220 docker-engine-debugsource.x86_64 2:18.09.0-316.oe220 docker-runc.src 1.1.3-9.oe2203sp1 docker-runc.x86_64 1.1.3-9.oe2203sp1 podman-docker.noarch 1:0.10.1-12.oe2203s python-docker.src 5.0.3-1.oe2203sp1 python-docker-help.noarch 5.0.3-1.oe2203sp1 python-docker-pycreds.src 0.4.0-2.oe2203sp1 python-dockerpty.src 0.4.1-3.oe2203sp1 python-dockerpty-help.noarch 0.4.1-3.oe2203sp1 python3-docker.noarch 5.0.3-1.oe2203sp1 python3-docker-pycreds.noarch 0.4.0-2.oe2203sp1 python3-dockerpty.noarch 0.4.1-3.oe2203sp1 安装docker dnf install docker Last metadata expiration check: 0:53:18 ago on Dependencies resolved. =============================================================================== Package Architecture Version Repository Size =============================================================================== Installing: docker-engine x86_64 2:18.09.0-316.oe2203sp1 OS 38 M Installing dependencies: libcgroup x86_64 0.42.2-3.oe2203sp1 OS Transaction Summary =============================================================================== Install 2 Packages Total download size: 39 M Installed size: 160 M Is this ok : y Downloading Packages: (1/2): libcgroup-0.42.2-3.oe2203sp1.x86_64.rpm 396 kB/s | 96 kB 00:00 (2/2): docker-engine-18.09.0-316.oe2203sp1.x86_64.rpm 10 MB/s | 38 MB 00:03 -------------------------------------------------------------------------------- Total 10 MB/s | 39 MB 00:03 Running transaction check Transaction check succeeded. Running transaction test Transaction test succeeded. Running transaction Preparing : 1/1 Running scriptlet: libcgroup-0.42.2-3.oe2203sp1.x86_64 1/2 Installing : libcgroup-0.42.2-3.oe2203sp1.x86_64 1/2 Running scriptlet: libcgroup-0.42.2-3.oe2203sp1.x86_64 1/2 Installing : docker-engine-2:18.09.0-316.oe2203sp1.x86_64 2/2 Running scriptlet: docker-engine-2:18.09.0-316.oe2203sp1.x86_64 2/2 Created symlink /etc/systemd/system/multi-user.target.wants/docker.service → /usr/lib/systemd/system/docker.service. Verifying : docker-engine-2:18.09.0-316.oe2203sp1.x86_64 1/2 Verifying : libcgroup-0.42.2-3.oe2203sp1.x86_64 2/2 Installed: docker-engine-2:18.09.0-316.oe2203sp1.x86_64 libcgroup-0.42.2-3.oe2203sp1.x86_64 Complete! 设置docker开机启动并启动 systemctl enable --now docker 查看docker版本 docker version Client: Version: 18.09.0 EulerVersion: 18.09.0.316 API version: 1.39 Go version: go1.17.3 Git commit: 9b9af2f Built: Tue Dec 27 14:25:30 2022 OS/Arch: linux/amd64 Experimental: false Server: Engine: Version: 18.09.0 EulerVersion: 18.09.0.316 API version: 1.39 (minimum version 1.12) Go version: go1.17.3 Git commit: 9b9af2f Built: Tue Dec 27 14:24:56 2022 OS/Arch: linux/amd64 Experimental: false 四、K8S软件安装 安装k8s依赖,连接跟踪 dnf install conntrack k8s master节点安装 dnf install -y kubernetes-kubeadm kubernetes-kubelet kubernetes-master k8s worker节点安装 dnf install -y kubernetes-kubeadm kubernetes-kubelet kubernetes-node systemctl enable kubelet 五、K8S集群初始化master kubeadm init --apiserver-advertise-address=192.168.10.1 --image-repository registry.aliyuncs.com/google_containers --kubernetes-version v1.20.2 --service-cidr=10.1.0.0/16 --pod-network-cidr=10.244.0.0/16 输出: Using Kubernetes version: v1.20.2 Running pre-flight checks : detected "cgroupfs" as the Docker cgroup driver. The recommended driver is "systemd". Please follow the guide at https://kubernetes.io/docs/setup/cri/ : socat not found in system path Pulling images required for setting up a Kubernetes cluster This might take a minute or two, depending on the speed of your internet connection You can also perform this action in beforehand using 'kubeadm config images pull' Using certificateDir folder "/etc/kubernetes/pki" Generating "ca" certificate and key Generating "apiserver" certificate and key apiserver serving cert is signed for DNS names and IPs Generating "apiserver-kubelet-client" certificate and key Generating "front-proxy-ca" certificate and key Generating "front-proxy-client" certificate and key Generating "etcd/ca" certificate and key Generating "etcd/server" certificate and key etcd/server serving cert is signed for DNS names and IPs Generating "etcd/peer" certificate and key etcd/peer serving cert is signed for DNS names and IPs Generating "etcd/healthcheck-client" certificate and key Generating "apiserver-etcd-client" certificate and key Generating "sa" key and public key Using kubeconfig folder "/etc/kubernetes" Writing "admin.conf" kubeconfig file Writing "kubelet.conf" kubeconfig file Writing "controller-manager.conf" kubeconfig file Writing "scheduler.conf" kubeconfig file Writing kubelet environment file with flags to file "/var/lib/kubelet/kubeadm-flags.env" Writing kubelet configuration to file "/var/lib/kubelet/config.yaml" Starting the kubelet Using manifest folder "/etc/kubernetes/manifests" Creating static Pod manifest for "kube-apiserver" Creating static Pod manifest for "kube-controller-manager" Creating static Pod manifest for "kube-scheduler" Creating static Pod manifest for local etcd in "/etc/kubernetes/manifests" Waiting for the kubelet to boot up the control plane as static Pods from directory "/etc/kubernetes/manifests". This can take up to 4m0s All control plane components are healthy after 6.502722 seconds Storing the configuration used in ConfigMap "kubeadm-config" in the "kube-system" Namespace Creating a ConfigMap "kubelet-config-1.20" in namespace kube-system with the configuration for the kubelets in the cluster Skipping phase. Please see --upload-certs Marking the node k8s-master01 as control-plane by adding the labels "node-role.kubernetes.io/master=''" and "node-role.kubernetes.io/control-plane='' (deprecated)" Marking the node k8s-master01 as control-plane by adding the taints Using token: jvx2bb.pfd31288qyqcfsn7 Configuring bootstrap tokens, cluster-info ConfigMap, RBAC Roles configured RBAC rules to allow Node Bootstrap tokens to get nodes configured RBAC rules to allow Node Bootstrap tokens to post CSRs in order for nodes to get long term certificate credentials configured RBAC rules to allow the csrapprover controller automatically approve CSRs from a Node Bootstrap Token configured RBAC rules to allow certificate rotation for all node client certificates in the cluster Creating the "cluster-info" ConfigMap in the "kube-public" namespace Updating "/etc/kubernetes/kubelet.conf" to point to a rotatable kubelet client certificate and key Applied essential addon: CoreDNS Applied essential addon: kube-proxy Your Kubernetes control-plane has initialized successfully! To start using your cluster, you need to run the following as a regular user: mkdir -p $HOME/.kube sudo cp -i /etc/kubernetes/admin.conf $HOME/.kube/config sudo chown $(id -u):$(id -g) $HOME/.kube/config Alternatively, if you are the root user, you can run: export KUBECONFIG=/etc/kubernetes/admin.conf You should now deploy a pod network to the cluster. Run "kubectl apply -f .yaml" with one of the options listed at: https://kubernetes.io/docs/concepts/cluster-administration/addons/ Then you can join any number of worker nodes by running the following on each as root: kubeadm join 192.168.10.1:6443 --token jvx2bb.pfd31288qyqcfsn7 \ --discovery-token-ca-cert-hash sha256:740fa71f6c5acf156195ce6989cb49b7a64fd061b8bf56e4b1b684cbedafbd40 # mkdir -p $HOME/.kube # sudo cp -i /etc/kubernetes/admin.conf $HOME/.kube/config # sudo chown $(id -u):$(id -g) $HOME/.kube/config 六、K8S集群工作节点加入 kubeadm join 192.168.10.1:6443 --token jvx2bb.pfd31288qyqcfsn7 \ --discovery-token-ca-cert-hash sha256:740fa71f6c5acf156195ce6989cb49b7a64fd061b8bf56e4b1b684cbedafbd40 # kubeadm join 192.168.10.1:6443 --token jvx2bb.pfd31288qyqcfsn7 \ --discovery-token-ca-cert-hash sha256:740fa71f6c5acf156195ce6989cb49b7a64fd061b8bf56e4b1b684cbedafbd40 # kubectl get nodes NAME STATUS ROLES AGE VERSION k8s-master01 NotReady control-plane,master 3m59s v1.20.2 k8s-node01 NotReady <none> 18s v1.20.2 k8s-node02 NotReady <none> 10s v1.20.2 七、K8S集群网络插件使用 # wget https://docs.projectcalico.org/v3.19/manifests/calico.yaml 由于网络问题,我这边使用离线方式安装插件calico 1. 去github上面下载自己所需的calico离线包,项目地址: https://github.com/projectcalico/calico 2. 假设要安装最新版本v3.28.0,首先可以下载这个版本的calico.yaml,具体命令是 curl -O -L https://raw.githubusercontent.com/projectcalico/calico/v3.28.0/manifests/calico.yaml 3. 下载完成之后可以通过calico.yaml查看需要安装哪些离线包,命令是: cat calico.yaml | grep image image: docker.io/calico/cni:v3.28.0 imagePullPolicy: IfNotPresent image: docker.io/calico/cni:v3.28.0 imagePullPolicy: IfNotPresent image: docker.io/calico/node:v3.28.0 imagePullPolicy: IfNotPresent image: docker.io/calico/node:v3.28.0 imagePullPolicy: IfNotPresent image: docker.io/calico/kube-controllers:v3.28.0 imagePullPolicy: IfNotPresent 4. 通过上述命令,查看到需要安装calico-cni.tar, calico-kube-controllers.tar 和 calico-node.tar三个包,然后需要将这三个包导入到k8s的命名空间中 使用导入命令将这三个包导入到k8s的命名空间中: docker load -i calico-cni.tar docker load -i calico-node.tar docker load -i calico-kube-controllers.tar 5. 导入之后就可以apply calico.yaml 文件了 6. 导入之后查看calico的pod,发现calico和coredns已经起来了 kubectl get pods -n kube-system NAME READY STATUS RESTARTS AGE calico-kube-controllers-8d76c5f9b-brv86 1/1 Running 0 22h calico-node-hxks2 1/1 Running 0 22h coredns-66f779496c-9hqsx 1/1 Running 0 23h coredns-66f779496c-rcc74 1/1 Running 0 23h etcd-kevin-pc 1/1 Running 4 (28m ago) 23h kube-apiserver-kevin-pc 1/1 Running 4 (28m ago) 23h kube-controller-manager-kevin-pc 1/1 Running 4 (28m ago) 23h kube-proxy-gglh4 1/1 Running 1 (28m ago) 23h kube-scheduler-kevin-pc 1/1 Running 4 (28m ago) 23h
 -
 VNC一款超好用的局域网远程控制工具 VNC一款超好用的局域网远程控制工具 Vnc是一种远程桌面分享系统,它允许用户通过网络连接从另一台计算机控制另一台电脑的桌面环境。VNC基于RFB(Remote Framebuffer)协议,最初由AT&T的欧洲实验室于1998年开发。现在,VNC已经成为最流行的远程控制工具之一,被广泛应用于远程技术支持、远程工作、在线游戏以及访问受限的网络资源等场景。 安装步骤: 本软件分为服务端和客户端两部分。 服务端安装步骤 1.1首先解压压缩包,双击VNC-Server-6.7.2-Windows文件夹,然后打开VNC-Server-6.7.2-Windows.exe。 1.2 弹出的窗口选OK,然后点击next,新的界面先勾选再点击next。 1.3该窗口可以选择软件的安装路径,如果无特殊需求可以直接用默认的安装路径,点next;新弹出的窗口继续next;然后点击install。 1.4出现下图证明你的服务端已经安装成功了。 1.5该步骤是为服务器添加一个用于连接到这台主机的VNC账户密码,参考步骤如下图,执行完这5步后服务端就算彻底安装完毕了。 客户端安装 2.1打开文件夹VNC-Viewer-6.20.529-Windows,双击运行VNC-Viewer-6.20.529-Windows.exe;弹出的窗口点击ok 2.2到这里,客户端就算安装完毕了,下面进行客户端的使用操作 可以看到VNC已经远程成功了
 -
 Jumper server 使用指导书 浏览器打开: https://堡垒机IP 登录jumper server堡垒机 ——下图表示登录成功,来到个人首页 点击”个人信息”旁切换按钮,切换到”工作台”,再点击“我的资产”,右侧就能看到此账号所授权的资产 点击资产右侧的“>_“会跳转到以下界面,点击连接,就可以直接远程到对应的资产 完成 文件上传 点击文件管理就能看到文件上传按钮 点击即可上传文件 文件下载: 在服务器文件管理器点击JumpServer-Lion 进入到\tsclient\JumpServer\Download目录 把文件拖拽进这个目录即可下载对应文件 复制粘贴使用 本地复制文本后点击剪切板即可复制进服务器内 Linux文件管理⚓︎ 1 批量传输⚓︎ • JumpServer 支持对文件进行批量传输,即将本地文件批量的上传到多个JumpServer纳管的资产中。 2 文件管理⚓︎ • 文件管理是传输文件的一种方式,上传下载默认 SFTP 目录默认为/tmp 路径。 • SFTP 目录与资产平台进行绑定,JumpServer 默认平台的 SFTP 目录无法修改(需联系管理员操作修改) 2.1 页面使用⚓︎ • 点击左侧节点树对应资产,即可进入资产中的 SFTP 目录。 • 进入 SFTP 目录后,即可对文件夹或文件对应操作。 • 操作方式支持两种,第一种方式:直接在右侧页面右击唤出操作菜单;第二种方式:上方黑色部分的按钮进行对应的操作。
 -
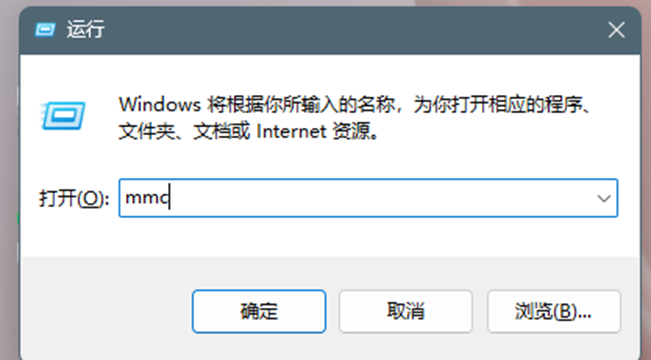
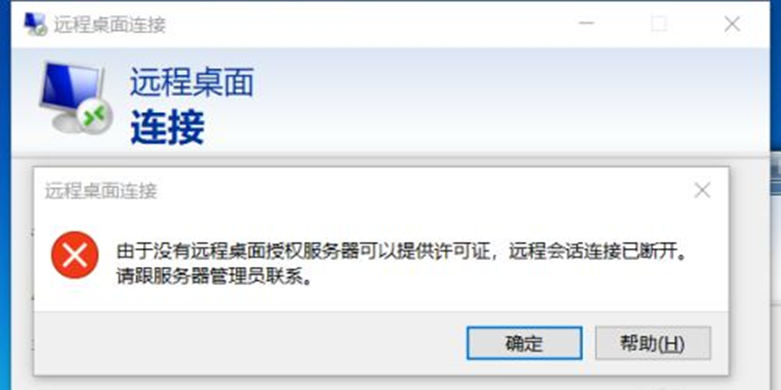 【Windows Server】由于没有远程桌面授权服务器可以提供许可 由于没有远程桌面授权服务器可以提供许可证,远程会话连接已断开。请跟服务器管理员联系。原因是服务器安装了远程桌面服务RemoteApp,这个是需要授权的。但是微软官方给予了120天免授权使用,超过120天还没有可用授权就会出现远程会话被中断,可修改注册表来延长使用期限,此方法win2008和win2012适用 1、 首先进入安装了远程桌面服务RemoteApp的服务器,我这里是win2012 2、 按 win+R 键 打开运行,输入regedit 然后按 确定 3、 然后就打开了注册表编辑器 4、 然后进入 HKEY_LOCAL_MACHINE \ SYSTEM \ CurrentControlSet \ Control \ Terminal Server \ RCM \ GracePeriod ,选中 GracePeriod 然后右键 点击 权限 选择Administrators , 把完全控制勾上,点击确定后提示:无法保存对GracePeriod权限所作的更改。 5、administrator权限赋予 回到GracePeriod,右键权限,点击高级 点击更改所有者 注意:这里选择的是Administrators,看上图中的图标。 更改所有者后在审核里进行添加 选择Administrators为主体后,在此处添加完全控制权限 6、、 选择Administrators , 然后把 完全控制 勾上 , 再按确定 7、、 选中注册表中的 REG_BINARY,然后右键 删除 8、、 选择 是 9、然后关掉注册表编辑器,重启服务器 10、重启服务器后就不会被中断了,此方法可以继续使用120天,等到120天到了再按此方法进行操作就可以再继续使用了
 -
 Exchange 2013/2016安装SSL证书步骤 Exchange分为2013和2016版,安装SSL证书的步骤教程大致相同,主要分为导入SSL证书、绑定SSL证书2大步骤,您可以参考以下步骤为Exchange 2013/2016安装SSL证书。 一、导入SSL证书 1、首先需要导入SSL证书,键盘同时按住 win+r 进入运行对话框,在运行对话框中输入“mmc”,点击“确定”进入控制台 2、在控制台界面依次点击“文件”-“添加/删除管理单元” 3、然后选择“证书”,点击“添加”进入证书管理单元 4、在证书管理单元选择“计算机账户”,然后点击“下一页” 5、选择计算机默认,然后进入下一步 6、在“个人”-“证书”处右击,选择“所有任务”-“导入”进入证书导入向导界面 7、在证书导入向导界面中选择“浏览” 8、随后选择我们提供的压缩包里IIS文件夹中的pfx格式的证书,例如“racent_com.pfx” 9、输入IIS文件夹中password文件中的密码,然后点击“下一页” 10、选中“将所有的证书都放入下列存储”,然后证书储存设置为“个人”,然后点击“下一页” 11、这样就导入SSL证书了,导入成功后会显示完整的三个证书 二、绑定SSL证书 1、接下来要绑定应用您的SSL证书,请返回到Exchange管理中心。在“服务器”-“证书”中,选择正确服务器,找到导入的证书,选择该证书,点击“编辑” 2、随后单击左侧的“服务Services”按钮,选择要使用证书服务,单击“保存save”按钮即可 以上步骤操作完毕,现在,您的证书已成功安装并启用。